Discover the fun of creating Lightning McQueen’s iconic eyes and mouth with a specialized chocolate mold. Perfect for fans, this mold brings McQueen to life in delicious detail.
Great for gifts or celebrations, it’s an exciting project for chocolate lovers of all skill levels, combining creativity and taste in a unique way.
Overview of the Project
This project involves creating a detailed Lightning McQueen chocolate piece using a specialized mold designed for his iconic eyes and mouth. It’s a fun and creative activity for chocolate enthusiasts and fans of the character. The process includes preparing the mold, melting and tempering chocolate, and carefully filling the mold to achieve precise details. Once set, the chocolate is demolded and decorated to bring McQueen to life. This project is suitable for all skill levels, requiring basic tools and high-quality chocolate. Follow the instructions closely to ensure the best results and enjoy your edible Lightning McQueen creation.
The mold’s design ensures that the final product captures the character’s recognizable features, making it a great gift or centerpiece for themed events. With patience and attention to detail, you’ll achieve a professional-looking chocolate replica of Lightning McQueen’s eyes and mouth.

Materials and Tools Needed

A Lightning McQueen eyes and mouth chocolate mold, high-quality chocolate, melting tools, and items for cleanup are essential for a smooth and successful molding process.
Essential Tools for Chocolate Molding
The Lightning McQueen eyes and mouth chocolate mold is a must-have for detailed work. Additional tools include a double boiler or microwave-safe bowl for melting, a spatula for smooth pouring, and a clean, dry workspace. A thermometer is crucial for tempering chocolate to achieve a glossy finish. Parchment paper and cleaning supplies like a soft brush or damp cloth are also handy for quick cleanups. These tools ensure precision and efficiency, making the chocolate molding process enjoyable and stress-free.
Having the right tools ready beforehand guarantees a seamless experience and professional-looking results.
Types of Molds Available
Lightning McQueen chocolate molds come in various types, with plastic and silicone being the most popular. Plastic molds are durable, easy to clean, and ideal for beginners. Silicone molds, on the other hand, are flexible, making demolding easier and allowing for intricate details.
Both types are available in designs specifically tailored for creating McQueen’s eyes and mouth, ensuring precise and professional-looking results. Choose the mold that best suits your skill level and desired level of detail for your chocolate creation.
Choosing the Right Chocolate
Selecting the right chocolate is crucial for achieving detailed and professional-looking Lightning McQueen pieces. High-quality chocolate ensures better taste and texture, while proper tempering creates a smooth, glossy finish. Avoid using low-quality chocolate, as it may result in a dull appearance or poor mold release.
Opt for chocolate with a high cocoa butter content for superior molding properties. If using flavored chocolate, ensure it complements the design without overpowering it. Properly melted and tempered chocolate guarantees sharp details and a flawless finish.
Preparation Steps
Thoroughly clean and prepare the mold to ensure smooth chocolate flow. Assemble all mold pieces securely. Gather tools, chocolate, and workspace essentials before starting the process.
Melt the chocolate according to instructions, ensuring proper tempering for a glossy finish. Prepare the workspace to avoid spills and make cleanup efficient.
Cleaning and Preparing the Mold
Begin by washing the Lightning McQueen chocolate mold with mild soap and warm water. Gently scrub to remove any residue or dust. Rinse thoroughly and pat dry with a clean cloth to prevent water spots. Ensure the mold is completely dry before use, as moisture can damage the chocolate. If using a silicone mold, lightly spray with cooking spray for easier demolding; Assemble the mold pieces securely, aligning all details properly. Place the mold on a flat, stable surface to prepare for filling. A clean, dry mold ensures smooth chocolate flow and sharp details in the final product.
Assembling the Mold Pieces
Start by carefully aligning the mold pieces according to the Lightning McQueen design. Ensure each part fits snugly to maintain the character’s details. Use a flat surface to assemble the mold, locking the pieces securely to prevent leakage. Gently press each section together, making sure edges align perfectly. Double-check that all parts are tightly sealed to avoid chocolate seeping out. Once assembled, place the mold on a stable surface or baking sheet for added support during the filling process. Proper assembly ensures a clean, precise chocolate replica of Lightning McQueen’s eyes and mouth.
Melting the Chocolate
Melt high-quality chocolate using a double boiler or microwave-safe bowl in short intervals, stirring until smooth. Proper melting ensures even pouring and a polished finish.
Methods for Melting Chocolate
There are several effective methods to melt chocolate for your Lightning McQueen mold. The double boiler technique involves placing chocolate in a heatproof bowl over simmering water, stirring occasionally until smooth. Alternatively, use a microwave-safe bowl, heating in 30-second increments and stirring between each interval to prevent burning. Both methods ensure a consistent texture, crucial for detailed molds. For best results, avoid overheating, as it can seize the chocolate, making it unusable. Proper melting is key to achieving a flawless finish in your Lightning McQueen chocolate creation.
Tempering Chocolate for Better Results
Tempering chocolate enhances its texture, gloss, and durability, making it ideal for detailed molds like Lightning McQueen. Melt chocolate to around 105°F, then cool it to 82°F to seed with tempered chocolate. Reheat to 88-90°F for working. This process sets cocoa butter crystals, ensuring a smooth finish and crisp snap. Proper tempering prevents blooming and ensures your McQueen chocolate stays visually appealing and professional-looking. Use a thermometer for accuracy and avoid overheating, as it can ruin the temper. Tempered chocolate sets faster, making it perfect for intricate designs and ensuring long-lasting results.

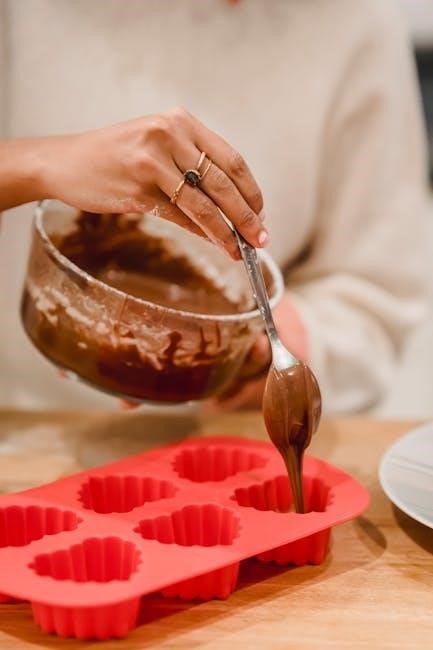
Filling the Mold
Pour melted, tempered chocolate into the mold, ensuring even distribution. Tap gently to remove air bubbles for a smooth, detailed finish, capturing McQueen’s features perfectly.
Tips for Even Pouring
- Warm the mold slightly before pouring to ensure chocolate spreads evenly.
- Pour melted chocolate in a steady, continuous flow to avoid air pockets.
- Use a spatula to guide the chocolate into intricate details like eyes and mouth.
- Avoid overfilling to prevent spills and maintain sharp edges.
- Tap the mold gently to release any air bubbles for a smooth finish.
- Work in a cool, dry environment to keep chocolate from melting unevenly.
These techniques ensure a professional-quality finish for Lightning McQueen’s features.
Avoiding Air Bubbles
To prevent air bubbles when filling the Lightning McQueen mold, pour the melted chocolate slowly and steadily. Tilt the mold gently to ensure even coverage, and use a spatula to guide the chocolate into intricate areas like the eyes and mouth. Tap the mold lightly on the counter to release any trapped air. Avoid over-pouring, as this can create excess that hardens unevenly. For best results, work in a cool, dry space to maintain the chocolate’s consistency. A smooth, bubble-free finish ensures the details of McQueen’s features remain sharp and clear.

Cooling the Chocolate

For optimal results, place the filled mold in the refrigerator at 35-40°F (2-4°C). Monitor temperature to prevent blooming. Avoid direct sunlight during cooling to ensure a smooth finish and proper setting within 30 minutes.
Refrigeration Techniques
Place the filled mold on a flat surface in the refrigerator, ensuring it’s level to prevent uneven cooling. Set the temperature between 35-40°F (2-4°C) for optimal chilling. Avoid direct sunlight, as it can cause the chocolate to bloom or soften. Allow the chocolate to cool for 20-30 minutes or until set firmly. Over-chilling can make the chocolate brittle, so monitor the process closely. Once set, remove the mold from the fridge and let it sit at room temperature for 5 minutes before demolding. This ensures a smooth, professional finish.
Ensuring Proper Setting
After refrigeration, check the chocolate by gently lifting the mold. If it feels firm and detaches easily, it’s set. Avoid opening the fridge too often, as temperature fluctuations can disrupt the setting process. Once set, remove the mold from the fridge and let it sit at room temperature for 5-10 minutes. This allows the chocolate to stabilize, preventing cracking. Lightly tap the mold to ensure the chocolate is fully released before demolding. Proper setting ensures sharp details and a polished finish, making your Lightning McQueen chocolate replica look professional and ready for display or gifting.
Demolding the Chocolate
Gently lift the mold to check if the chocolate is set. If firm and detached easily, it’s ready. Handle carefully to maintain sharp details and avoid breakage.
Safe Removal Techniques
Once the chocolate is fully set, gently lift the mold to check if the edges release easily. If not, lightly tap the mold on a flat surface to loosen the chocolate. Avoid applying too much pressure, which could cause breakage. For stubborn areas, use a blunt knife or spatula to carefully pry the chocolate away from the mold. Handle the delicate details, like the eyes and mouth, with extra care to maintain their sharpness and integrity. Patience and gentle handling ensure your Lightning McQueen chocolate piece remains intact and perfectly detailed.
Handling Delicate Details
When handling the delicate details of Lightning McQueen’s eyes and mouth, use a small, soft-bristled brush or a toothpick to gently paint or correct fine features. Avoid applying too much pressure, as this could damage the chocolate or cause smudging. For intricate areas, melt a small amount of chocolate and use a fine tool to fill in any gaps or imperfections. Handle the mold with care to prevent breakage, especially around the thin edges of the details. Patience and precision ensure the final piece retains its sharp, iconic features and looks as vibrant as the character himself.

Decorating the Chocolate
Bring Lightning McQueen to life by painting his iconic eyes and mouth with edible markers or melted chocolate. Add fine details carefully for a polished, authentic finish.
Painting the Eyes and Mouth
Painting Lightning McQueen’s eyes and mouth is a crucial step for authenticity. Use edible markers or melted chocolate to draw the iconic features. Start with the eyes, ensuring symmetry, then add the mouth. For precision, use a toothpick dipped in melted chocolate to create fine details. Refer to a reference image for accuracy. Work patiently to avoid smudging. Once complete, let the chocolate set before handling. This step brings the character to life, making your chocolate replica recognizable and delightful. Achieve a polished finish by carefully blending colors and ensuring clean lines.
Adding Fine Details
Enhance your Lightning McQueen chocolate by adding fine details like the racing stripe or headlights. Use a toothpick dipped in melted chocolate to create precise outlines. For smaller features, edible markers work perfectly, allowing you to define edges and textures. Ensure all details align with the character’s iconic design for authenticity. Let the chocolate set slightly before adding finer touches to avoid smudging. These small enhancements bring depth and personality to your creation, making it stand out as a detailed replica. Patience and precision are key to achieving a professional finish.

Troubleshooting Common Issues

Common issues include air bubbles, uneven pouring, or chocolate sticking to the mold. Tap gently to remove bubbles and use a hairdryer on low heat to avoid sticking.
Fixing Imperfections
Identify common imperfections like air bubbles, uneven layers, or chocolate sticking to the mold. Gently tap the mold to remove air bubbles. For stuck chocolate, use a hairdryer on low heat to slightly melt the edges. Smoothen uneven areas with a toothpick or small knife while the chocolate is still melted. To fix fine details, apply a small amount of melted chocolate with a precision tool. Regularly inspect the mold during pouring to catch issues early. Proper tempering and even pouring help prevent these imperfections, ensuring a flawless Lightning McQueen replica.
Preventing Breakage
To prevent breakage, handle the chocolate mold gently to avoid cracks. Use high-quality chocolate with proper tempering for flexibility. Allow the chocolate to cool and set completely before demolding. Tap the mold lightly on the counter to loosen the chocolate evenly. Avoid bending or flexing the mold excessively, as this can cause stress fractures. For delicate details, use a soft brush to remove excess chocolate before pouring. Store the finished chocolate in a cool, dry place away from direct sunlight to maintain its structure and prevent cracking.

Safety Tips and Precautions
Ensure all tools and surfaces are clean to prevent contamination. Use protective gloves when handling hot tools or melted chocolate. Keep children away from hot chocolate and sharp objects. Avoid overheating chocolate, as it can cause burns. Store molds in a safe place to prevent accidental breakage. Always supervise children during the chocolate-making process to ensure their safety. Follow proper hygiene practices to maintain a safe and enjoyable experience.
Working with Chocolate Safely
When working with chocolate, ensure all tools and surfaces are clean to prevent contamination. Avoid overheating chocolate, as it can cause burns. Use protective gloves when handling hot tools or melted chocolate to protect your skin. Keep children away from hot chocolate and sharp objects to prevent accidents. Maintain a clean workspace to avoid slipping hazards. Always supervise children during the chocolate-making process. Be patient and work carefully to achieve professional-looking results. Proper safety precautions ensure a safe and enjoyable chocolate-molding experience for everyone involved.
Store chocolate in a cool, dry place to preserve its quality. Never leave melting chocolate unattended, as it can easily overheat. Use high-quality chocolate designed for molding to achieve the best results. Keep the mold on a stable surface to prevent it from tipping over. Handle the mold gently to avoid breakage. By following these guidelines, you can create a Lightning McQueen chocolate piece safely and effectively, making the process enjoyable and stress-free.
Guidelines for Involving Children
Engage children safely by assigning age-appropriate tasks, such as assembling the mold or decorating. Ensure adult supervision, especially when handling hot chocolate or sharp tools. Teach children to handle the mold gently to avoid breakage. Encourage creativity while painting details, making it a fun learning experience. Use this activity to teach responsibility and patience. Keep the process enjoyable by allowing children to contribute simple steps, fostering their interest in crafting and creativity; This collaborative effort makes the project rewarding for everyone involved.
Celebrate your creativity with a Lightning McQueen chocolate mold, perfect for fans of all ages. Take pride in your edible Lightning McQueen masterpiece, a delightful treat for any occasion.
Final Thoughts and Encouragement
Creating a Lightning McQueen chocolate piece is a delightful and rewarding experience. With patience and practice, you can craft a stunning replica that impresses both kids and adults. Don’t be discouraged by initial imperfections—each attempt brings improvement. Share your creations at parties or as gifts to spread joy. Embrace the process, enjoy the sweet results, and remember, every mold tells a story of your creativity and passion for chocolate artistry!