
Honeywell TH4110U2005 Installation Manual PDF: A Comprehensive Guide
Honeywell provides comprehensive PDF manuals for the TH4110U2005 T4 Pro thermostat, offering detailed instructions and support for installation and operation. These resources, available online, cover everything from initial setup to advanced features, ensuring a smooth user experience.
The Honeywell TH4110U2005 is a T4 Pro Programmable Thermostat designed for efficient home climate control. This model, alongside the TH4210U2002, offers users a blend of functionality and ease of use. Accessing the official PDF manual is crucial for understanding its capabilities.

This thermostat is part of the T4 Pro series, known for its user-friendly interface and programmable scheduling features. The manual details how to navigate the thermostat’s settings, allowing for customized heating and cooling schedules to optimize energy consumption. It’s designed for electric forced air or fan coil systems, as indicated in the instructions.
Honeywell Home utilizes licensing from Honeywell International, Inc., emphasizing the quality and reliability of the product. The manual provides a complete guide, ensuring users can effectively manage their home’s temperature and comfort levels.
Understanding the T4 Pro Programmable Thermostat Series
The Honeywell T4 Pro Programmable Thermostat series, including the TH4110U2005 and TH4210U2002 models, represents a significant step in home climate control technology. These thermostats are designed for ease of programming and operation, offering customizable schedules to maximize energy savings and comfort. The official PDF manual is essential for unlocking the full potential of these features.
Key characteristics of the T4 Pro series include a clear display, intuitive menu navigation, and compatibility with various heating and cooling systems. The manual details how to set up different schedules for weekdays and weekends, and how to adjust settings for vacation mode.
Honeywell Home’s licensing agreement with Honeywell International, Inc. underscores the series’ commitment to quality and innovation. Understanding the system changeover settings (heat/cool) is vital, as explained within the comprehensive instructions provided.
Where to Find the Official PDF Manual
Locating the official PDF manual for the Honeywell TH4110U2005 T4 Pro Programmable Thermostat is straightforward. A primary source is through online searches; numerous websites host direct links to the document. Honeywell Home’s official website is a reliable starting point, offering optimized PDF versions for download.
Several third-party sites specializing in appliance manuals also archive the TH4110U2005 user guide. These resources often provide quick access without requiring registration. Ensure the PDF is from a trusted source to guarantee accuracy and completeness of the instructions.
The manual is readily available as of April 28, 2024, and June 10, 2024, according to recent online reports. Downloading the PDF allows offline access to the installation and operational guidance, proving invaluable during setup and troubleshooting.

Pre-Installation Considerations
Before installing the Honeywell TH4110U2005, verify voltage compatibility and system requirements, and always consult the PDF manual for guidance.
Voltage Compatibility and System Requirements
Honeywell TH4110U2005 thermostats are designed to operate with standard 24VAC heating and cooling systems. The PDF installation manual explicitly details these requirements, emphasizing the importance of verifying your existing system’s voltage before proceeding. Compatibility extends to various system types, including forced air, heat pump, and fan coil systems, but specific configurations may necessitate adjustments.
Crucially, the manual outlines that the thermostat is not compatible with line voltage (120V/240V) systems. Attempting installation with incompatible voltage will cause damage and void the warranty. Furthermore, the manual specifies the types of heating and cooling stages supported, ensuring proper functionality. Reviewing the system changeover settings, detailed within the PDF, is vital for correct operation. Always prioritize safety and consult a qualified technician if unsure about your system’s specifications.
Tools Required for Installation
The Honeywell TH4110U2005 installation, as detailed in the official PDF manual, requires a minimal set of tools for a successful and safe setup. A small flathead screwdriver is essential for terminal connections and adjustments. A Phillips head screwdriver is also necessary for mounting the baseplate and thermostat body securely. Wire strippers are crucial for preparing the thermostat wires, ensuring clean and reliable connections.
Additionally, the manual recommends having a level available to guarantee the thermostat is mounted straight, improving its aesthetic appearance and accurate temperature sensing. A pencil is useful for marking screw locations during baseplate installation. While not strictly required, a digital multimeter can be helpful for verifying power and voltage, enhancing safety. Always refer to the PDF for specific tool recommendations and safety guidelines before beginning the installation process.

Safety Precautions Before Starting
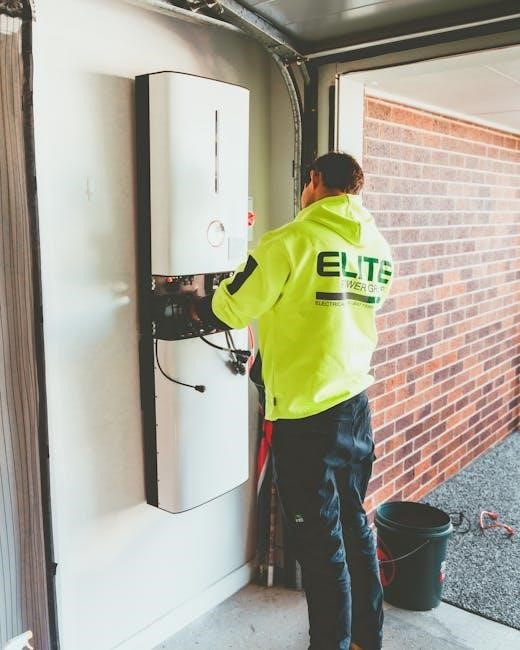
Prior to commencing the Honeywell TH4110U2005 installation, as emphasized in the official PDF manual, strict adherence to safety precautions is paramount. Crucially, always disconnect power to the heating and cooling system at the breaker box before handling any wiring. This prevents electrical shock and potential damage to the thermostat or system components.
The manual strongly advises against working with wet hands or in damp environments. Carefully label each wire before disconnecting it from the old thermostat to avoid confusion during reconnection. If you are uncomfortable working with electrical wiring, consult a qualified HVAC technician. Ensure the installation area is well-lit and free of obstructions. Review the entire PDF manual thoroughly to understand the process and potential hazards before beginning. Prioritizing safety ensures a secure and successful installation.

Installation Steps
The Honeywell TH4110U2005 PDF manual details a five-step process: removing the old thermostat, identifying wires, connecting them, mounting the baseplate, and attaching the body.
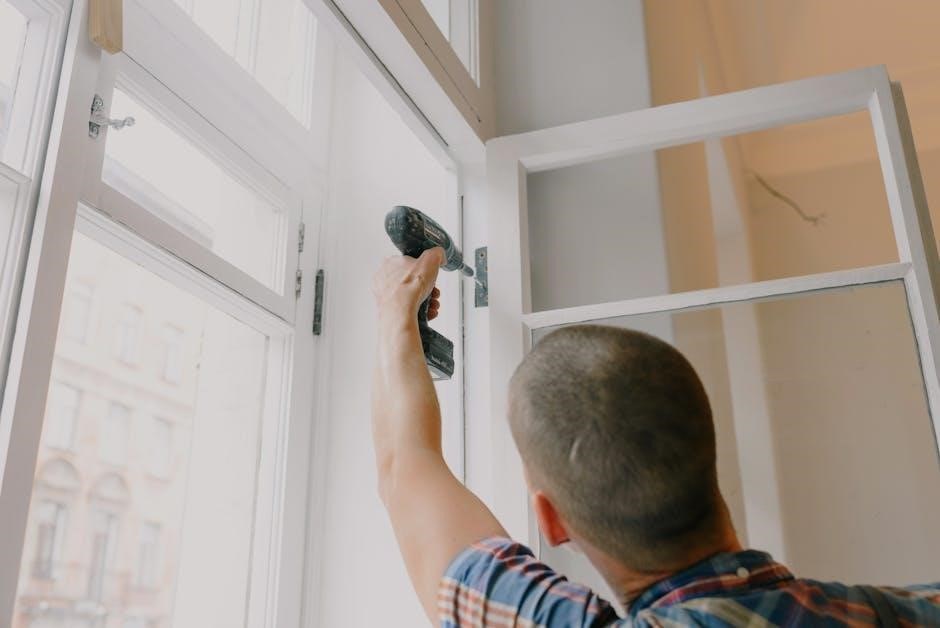
Step 1: Removing the Old Thermostat
Before beginning, always turn off power to your heating and cooling system at the breaker box to avoid electrical shock. The Honeywell TH4110U2005 manual emphasizes this safety precaution. Carefully remove the cover of your existing thermostat, often by gently snapping it off or loosening a screw.
Take a clear photograph of the existing wiring configuration before disconnecting any wires – this is crucial for accurate re-connection later. Label each wire with the corresponding terminal designation using the provided wire labels, if available, or masking tape and a pen. Disconnect the wires one at a time, ensuring they don’t fall back into the wall.
Remove the old thermostat baseplate from the wall. You may need to unscrew it or gently pry it loose. Ensure the wall surface is clean and smooth for mounting the new Honeywell baseplate.
Step 2: Identifying Thermostat Wires
Accurate wire identification is paramount for a successful Honeywell TH4110U2005 installation. Refer to the photograph taken during the old thermostat removal and the manual’s wiring diagram. Common wires include R (power), C (common – often blue, and crucial for the TH4110U2005), W (heat), Y (cooling), and G (fan).
The manual details that some systems may have additional wires like O/B (reversing valve) for heat pumps. If you encounter a wire labeled “ISU”, it’s specific to certain Honeywell systems and requires careful attention to the wiring diagram.
If unsure about any wire, consult a qualified HVAC technician. Incorrect wiring can damage your system. The Honeywell documentation stresses verifying the voltage before proceeding. Double-check all labels and connections against the manual before moving to the next step.
Step 3: Connecting the Wires to the TH4110U2005
With wires identified, carefully connect them to the corresponding terminals on the Honeywell TH4110U2005 baseplate. The manual provides a clear terminal block diagram. Ensure each wire is securely inserted into its designated terminal; a loose connection can cause malfunctions.
The ‘C’ wire, essential for powering the thermostat, must be connected. Gently tug on each wire after insertion to confirm a firm hold; Avoid stripping the wires excessively, as exposed copper can short circuit.
The Honeywell installation manual PDF emphasizes following the wiring diagram precisely. If your system uses a heat pump, pay close attention to the O/B wire connection. Document the wiring configuration for future reference.
Step 4: Mounting the Thermostat Baseplate
Once the wires are securely connected, carefully mount the Honeywell TH4110U2005 baseplate to the wall. Use the screws provided in the kit, ensuring they are appropriate for your wall type. The manual PDF recommends using wall anchors if screwing into drywall for a secure fit.

Position the baseplate level to ensure the thermostat displays correctly. Gently push any excess wire back into the wall opening, avoiding pinching or damaging them. The baseplate should sit flush against the wall, providing a stable foundation for the thermostat body.
Refer to the Honeywell installation guide for specific mounting details. Double-check that the baseplate is firmly attached before proceeding to the next step. A wobbly baseplate can lead to connection issues.
Step 5: Attaching the Thermostat Body
With the baseplate securely mounted, carefully align the Honeywell TH4110U2005 thermostat body with the base. Gently push the body onto the baseplate until it clicks into place, ensuring a snug and secure fit. The manual PDF illustrates the proper alignment and attachment process.
Avoid forcing the thermostat body onto the baseplate, as this could damage the internal components or wiring. If it doesn’t easily click on, re-check the alignment. Once attached, verify that the thermostat is firmly connected and doesn’t wobble.
The Honeywell guide emphasizes a secure connection for optimal performance. After attachment, proceed to the post-installation configuration steps outlined in the manual.

Post-Installation Configuration
The Honeywell TH4110U2005 manual PDF details initial power-up, date/time settings, and programming the heating/cooling schedule for personalized comfort control.
Initial Power-Up and Display Check
Upon completing the physical installation, as outlined in the Honeywell TH4110U2005 installation manual PDF, the thermostat should power on automatically. The display will initiate a self-test sequence, briefly showcasing various icons and information. Verify that the screen illuminates clearly and that all segments are functioning correctly.
The manual specifies that the initial display will likely show “Following Schedule” or a similar message, indicating the thermostat is ready for programming. If the display remains blank, double-check the wiring connections, ensuring proper voltage and secure connections to the terminals. Refer to the wiring diagrams within the PDF manual for accurate guidance.
Confirm the current time and date are displayed, even if inaccurate, as these will be adjusted in the subsequent configuration steps. A functioning display is crucial for navigating the thermostat’s settings and ensuring optimal performance. If issues persist, consult the troubleshooting section of the manual.
Setting the Date and Time
According to the Honeywell TH4110U2005 installation manual PDF, accurately setting the date and time is a fundamental step in configuring your thermostat. Access the settings menu by pressing and holding the ‘Menu’ button, as detailed in the manual. Navigate to the “Date/Time” option using the up and down arrow buttons.
The manual instructs users to adjust the month, day, and year sequentially, confirming each selection by pressing the ‘Select’ or ‘Menu’ button. Repeat this process for setting the hour and minute. Ensure you select the correct AM/PM designation. Accurate timekeeping is vital for the programmed heating and cooling schedules to function correctly.
The PDF manual emphasizes verifying the set date and time after configuration. Incorrect settings will lead to scheduling errors. If adjustments are needed, simply repeat the process. Proper date and time configuration ensures the thermostat operates efficiently and provides consistent comfort.
Programming the Heating and Cooling Schedule
The Honeywell TH4110U2005 installation manual PDF details a flexible programming system for heating and cooling. Access the scheduling options through the ‘Menu’ button, then navigate to “Schedule.” The manual explains four programmable periods: Wake, Leave, Return, and Sleep. Each period allows independent temperature settings for both heating and cooling.
The PDF manual guides users to set the desired temperature for each period, utilizing the up and down arrow buttons. Confirm each setting with the ‘Select’ button. You can also copy a schedule to other days for convenience, as outlined in the manual. The thermostat supports different schedules for weekdays and weekends.

The manual stresses reviewing the programmed schedule to ensure it aligns with your lifestyle. Correct scheduling maximizes energy savings and comfort. Experiment with different temperature settings to find the optimal balance. Detailed diagrams within the PDF illustrate the scheduling process.
Understanding System Changeover Settings (Heat/Cool)
The Honeywell TH4110U2005 installation manual PDF explains the “System Changeover” setting, crucial for systems with both heating and cooling capabilities. Accessed via the ‘Menu’ button, this setting determines how the thermostat switches between heating and cooling modes. The manual details two primary options: “Manual” and “Automatic.”
In “Manual” mode, the user explicitly selects either “Heat” or “Cool,” overriding any programmed schedule. The PDF manual emphasizes this is ideal for consistent weather conditions. “Automatic” mode, however, utilizes the set temperature and outdoor temperature (if a compatible sensor is installed) to automatically switch between modes.
The manual clarifies that the “System Changeover” temperature dictates when the switch occurs. Adjusting this temperature ensures comfortable indoor conditions. Diagrams within the PDF visually represent the changeover process. Proper configuration, as detailed in the manual, optimizes energy efficiency and comfort.
Troubleshooting Common Issues
The Honeywell TH4110U2005 manual PDF offers solutions for issues like no power, incorrect readings, Wi-Fi connectivity problems, and deciphering error codes.
Thermostat Not Powering On
If your Honeywell TH4110U2005 thermostat fails to power on, the manual PDF guides you through several troubleshooting steps. First, verify the power supply at the furnace or HVAC system, ensuring the circuit breaker hasn’t tripped. Check the thermostat wiring, confirming all connections are secure and correctly placed according to the wiring diagram within the manual.
Inspect the C-wire (common wire) connection, as this is crucial for consistent power. If a C-wire isn’t present, a C-wire adapter might be necessary – the manual details compatibility and installation. Also, confirm the thermostat baseplate is firmly mounted and properly seated. The PDF manual emphasizes checking for loose wires or corrosion at the terminals, potentially causing intermittent or complete power loss. Finally, review the manual’s section on battery replacement, if applicable, as low batteries can sometimes prevent operation.
Incorrect Temperature Readings
The Honeywell TH4110U2005 manual PDF addresses inaccurate temperature readings with a systematic approach. Begin by ensuring the thermostat isn’t directly exposed to sunlight, drafts, or heat-generating appliances, as these can skew measurements. Verify the thermostat is level, as an uneven installation can affect sensor accuracy. The manual details how to access the calibration settings, allowing for minor temperature adjustments to align with a trusted thermometer.
Check for obstructions blocking airflow around the thermostat. If the issue persists, the manual suggests reviewing the wiring connections, ensuring proper sensor communication. It also advises checking for nearby sources of interference. The PDF manual highlights the importance of allowing the thermostat sufficient time to stabilize after installation or adjustments, as initial readings may be temporarily inaccurate. Refer to the error code section if discrepancies continue.
Difficulty Connecting to Wi-Fi (if applicable)
The Honeywell TH4110U2005 manual PDF provides troubleshooting steps for Wi-Fi connectivity issues. First, confirm your home Wi-Fi network is functioning correctly and that the thermostat is within range of the router. The manual details how to enter the correct network password, emphasizing case sensitivity. Ensure your router is broadcasting on the 2.4 GHz band, as many smart thermostats don’t support 5 GHz networks.
Restart both the thermostat and your router; this often resolves temporary connection problems. The PDF manual instructs users to check for firmware updates, as these can improve Wi-Fi compatibility. If problems persist, temporarily disable any firewall settings that might be blocking the connection. Consult the manual’s FAQ section for specific router configurations and potential interference sources. Resetting the thermostat’s network settings, as outlined in the manual, is a final troubleshooting step.
Error Codes and Their Meanings
The Honeywell TH4110U2005 installation manual PDF includes a dedicated section detailing error codes and their corresponding solutions. These codes appear on the thermostat display, signaling specific issues with the system or the thermostat itself. Common codes relate to wiring problems, sensor malfunctions, or communication failures. The manual provides a comprehensive table listing each code, a plain-language explanation of the problem, and step-by-step troubleshooting guidance.
For example, a specific code might indicate a faulty temperature sensor, while another could signal a loss of communication with the heating or cooling system. The PDF manual emphasizes the importance of noting the exact error code before attempting any repairs. It also advises users to consult a qualified HVAC technician if they are uncomfortable performing the recommended troubleshooting steps or if the error persists after following the manual’s instructions.
Advanced Features and Settings
The Honeywell TH4110U2005 manual PDF details fan control, filter reminders, and vacation mode setup, enhancing comfort and energy efficiency for users.
Fan Control Options (Auto/On)
The Honeywell TH4110U2005 thermostat, as detailed in its manual PDF, offers two primary fan control settings: Auto and On. Selecting “Auto” mode ensures the fan operates only during heating or cooling cycles, contributing to energy savings and maintaining consistent temperature distribution throughout your home. This is the recommended setting for most users.
Conversely, the “On” mode keeps the fan running continuously, regardless of whether the heating or cooling system is actively engaged. This can provide improved air circulation, potentially enhancing comfort, and can be beneficial for those with allergies or sensitivities to stagnant air. However, continuous fan operation will increase energy consumption.
The manual provides clear instructions on how to toggle between these modes via the thermostat’s interface. Understanding these options allows users to customize their system for optimal comfort and efficiency, tailoring the operation to their specific needs and preferences. Proper configuration is key to maximizing the benefits of the thermostat.
Filter Change Reminders
The Honeywell TH4110U2005 thermostat, as outlined in the official manual PDF, incorporates a helpful filter change reminder feature. Maintaining a clean air filter is crucial for optimal HVAC system performance, air quality, and energy efficiency. The thermostat allows users to set a reminder based on time elapsed – typically every 1-3 months – prompting them when it’s time for a replacement.
The manual details how to access and configure this reminder through the thermostat’s menu system. Users can customize the reminder frequency to align with their specific filter type and usage patterns. Ignoring filter change reminders can lead to reduced airflow, increased energy bills, and potential damage to the HVAC system.
Activating this feature ensures proactive maintenance, contributing to a healthier home environment and extending the lifespan of your heating and cooling equipment. Regularly checking and replacing the filter, guided by the thermostat’s reminders, is a simple yet impactful step.
Vacation Mode Setup
The Honeywell TH4110U2005 thermostat’s manual PDF details a convenient “Vacation Mode” designed to save energy while you’re away from home. This feature allows you to set a lower heating temperature and a higher cooling temperature than your normal settings, minimizing energy consumption during extended absences. The manual provides step-by-step instructions on how to activate and configure Vacation Mode through the thermostat’s interface.
Users can specify the duration of their vacation, and the thermostat will automatically maintain the set temperatures until the vacation period ends, reverting to the programmed schedule afterward. This prevents unnecessary heating or cooling of an empty house. The manual emphasizes that Vacation Mode overrides the regular programming schedule.
Properly utilizing Vacation Mode, as described in the PDF, can result in significant energy savings and reduced utility bills, making it a valuable feature for homeowners who travel frequently.