Understanding proper T-shirt print size is crucial for ensuring designs fit well‚ look balanced‚ and maintain readability. This guide helps you navigate fabric types‚ design complexity‚ and placement symmetry to achieve professional results‚ avoiding distortion or illegibility. Proper sizing enhances both aesthetic appeal and comfort‚ making it essential for creators and businesses alike;
Importance of Proper Print Size
Proper print size is essential for ensuring designs are readable‚ balanced‚ and visually appealing on T-shirts. Incorrect sizing can lead to distorted images‚ illegibility‚ or an unprofessional finish. A well-sized print enhances the garment’s aesthetic‚ making it more attractive to wearers. For businesses‚ precise sizing is critical for branding‚ as it directly impacts the perceived quality of the product. Proper sizing also ensures symmetry and alignment‚ avoiding awkward placement that may deter customers. Additionally‚ it prevents issues like oversized designs overwhelming the garment or small prints getting lost. By prioritizing accurate dimensions‚ creators can achieve a polished‚ professional result that resonates with their target audience and maintains brand integrity. Proper print size is the foundation of successful T-shirt design and production.
Overview of Key Factors in Print Size
When determining T-shirt print size‚ several factors come into play. Garment type‚ such as crew necks‚ hoodies‚ or tank tops‚ influences printable areas. Design complexity and detail levels affect scaling‚ with intricate designs requiring higher DPI for clarity. Fabric type‚ like cotton or polyester blends‚ impacts absorbency and print durability. The target audience’s preferences‚ such as oversized or minimalist trends‚ also shape size choices. Additionally‚ printing techniques like DTG or screen printing have specific size constraints. Understanding these factors ensures prints are proportionate‚ legible‚ and visually appealing‚ meeting both aesthetic and functional goals. Balancing these elements is key to achieving high-quality‚ customer-satisfying results in custom T-shirt printing.
Understanding Standard Print Sizes
Standard T-shirt print sizes vary‚ with chest prints typically measuring 6-10 inches in width and 6-8 inches in height. Full-front designs range from 10-12 inches wide and 10-14 inches tall‚ ensuring balanced proportions and readability. These measurements serve as a foundation for customization‚ adapting to different garment types and target audiences while maintaining visual appeal and functionality.
Common Print Dimensions for Different Garment Types
Print dimensions vary based on garment type and size. For T-shirts‚ standard chest prints range from 6-10 inches in width and 6-8 inches in height‚ while full-front designs measure 10-12 inches wide and 10-14 inches tall. Hoodies typically have smaller front print areas due to pockets‚ averaging 8-10 inches wide. Tank tops and sleeveless shirts often use smaller designs‚ around 4-6 inches wide. Sweatshirts and long-sleeve shirts allow for larger prints‚ up to 12-16 inches wide. Youth and toddler sizes require scaled-down dimensions‚ usually 4-8 inches wide. These guidelines ensure designs are proportional and visually appealing across different apparel types and sizes.

Standard Measurements for Chest‚ Sleeve‚ and Back Prints
Standard measurements for chest prints typically range from 6-10 inches in width and 6-8 inches in height‚ ensuring visibility without overwhelming the garment. Sleeve prints are smaller‚ usually 3-4 inches wide and 2-4 inches tall‚ designed for subtle branding. Back prints often cover more area‚ with dimensions up to 12 inches wide and 14 inches tall‚ ideal for bold designs. These measurements vary slightly by garment size‚ with larger sizes accommodating bigger prints. Proper alignment and symmetry are key to ensure the design looks professional and balanced. Always consider garment type and size when selecting print dimensions for optimal visual appeal and comfort.

Factors Influencing Print Size
Garment size‚ design complexity‚ and image resolution are key factors influencing print size. Larger garments allow bigger prints‚ while intricate designs may require smaller dimensions for clarity and balance.

Garment Size and Fit Considerations
Garment size and fit significantly impact print dimensions. Larger sizes‚ such as XXL‚ offer more printable area‚ while smaller sizes like S or XS require downsizing designs to maintain proportions. Proper fit ensures designs aren’t stretched or distorted‚ preserving their visual appeal. Additionally‚ fabric type affects print size‚ as materials like cotton may shrink slightly after printing. It’s essential to consult sizing charts and consider factors like sleeve length and neckline shape to ensure seamless integration of the design with the garment. This balance ensures a professional finish and enhances the overall aesthetic of the custom T-shirt.
Design Complexity and Detail Levels
Design complexity and detail levels play a crucial role in determining print size. Intricate designs with fine details require higher DPI to maintain clarity‚ while simpler designs can be larger without losing quality. Text size is particularly sensitive; small fonts may become illegible when scaled down. For detailed artwork‚ it’s essential to balance size and resolution to ensure all elements remain visible. Larger garments can accommodate more complex designs‚ but smaller sizes may need simplification. Vector graphics are ideal for intricate designs‚ as they scale without losing quality. Always preview designs on mockups to ensure readability and aesthetic appeal before printing. Proper scaling ensures designs look sharp and professional on any garment size.
Image Resolution and Quality
Image resolution is critical for clear prints. Aim for 300 DPI to ensure sharp details. Lower DPI can result in blurry or pixelated designs‚ compromising quality and visual appeal.
Recommended DPI for T-Shirt Printing
For high-quality T-shirt printing‚ a resolution of 300 DPI is strongly recommended. This ensures sharp‚ clear details and prevents pixelation. Lower DPI‚ such as 150‚ may result in blurry designs‚ especially for intricate artwork. Vector images are ideal as they scale without losing quality‚ while raster images (JPEG‚ PNG) depend on DPI. Using 300 DPI guarantees professional-looking prints‚ making it a standard requirement for most print providers. Always check your design at actual size to confirm clarity before printing. Higher DPI ensures your designs stand out with crisp visuals‚ enhancing both aesthetic appeal and professionalism.
Vector vs. Raster Images for Printing
Vector images‚ composed of scalable lines and curves‚ maintain clarity at any size without losing quality‚ making them ideal for resizing designs. Raster images‚ made of pixels‚ degrade when scaled up‚ leading to blurry prints. For T-shirt printing‚ vector formats like SVG or AI are recommended for logos and graphics needing flexibility. Raster images (JPEG‚ PNG) are better for photographic designs‚ but require high DPI to avoid pixelation. Choosing the right format ensures sharp‚ professional results. Vector files are versatile‚ while raster files depend on resolution for quality‚ affecting the final print’s appearance and durability.
Choosing the Right Print Size
Selecting the ideal print size involves balancing design visibility‚ fabric type‚ and intended use. Proper sizing ensures legibility and aesthetic appeal‚ enhancing comfort and style for wearers of all sizes‚ ensuring designs are neither too overwhelming nor too subtle‚ thus optimizing visual impact and wearability for diverse audiences and purposes.
How to Measure and Adjust Designs
Measuring and adjusting designs is essential for achieving the perfect fit. Start by using a ruler or digital tool to measure the width and height of your design. Compare these dimensions to standard T-shirt print size charts‚ which vary by garment type and intended use. For example‚ chest prints typically range from 10-12 inches wide‚ while sleeve prints are smaller‚ around 3-4 inches. Adjust the design proportions while maintaining aspect ratio to avoid distortion. Use mockup tools to visualize placement on different shirt sizes. Ensure symmetry by centering designs or aligning them with seams. Finally‚ test the design on actual shirts to confirm sizing accuracy and make final tweaks for optimal appearance.
Matching Print Size to Target Audience
Print size should align with the target audience to ensure designs resonate effectively. For children and toddlers‚ smaller designs (6-9 inches wide) are ideal due to limited shirt space. Adults typically prefer standard sizes (10-12 inches for chest prints)‚ while youth sizes may require intermediate dimensions (8-10 inches). Consider the audience’s lifestyle and preferences: bold‚ larger designs suit fashion-forward audiences‚ while subtle‚ smaller prints appeal to professionals. Additionally‚ design complexity should match the audience’s expectations—simple logos for kids‚ detailed graphics for teens and adults. Always preview designs on mockups to ensure the size complements the intended wearer’s style and comfort‚ enhancing both visual appeal and practicality.
Placement and Alignment Guide

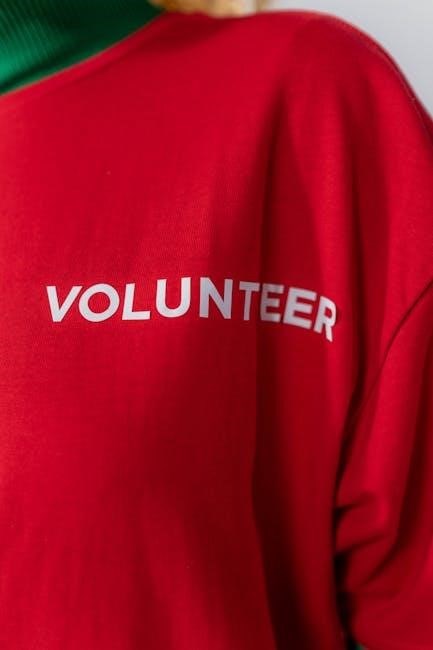
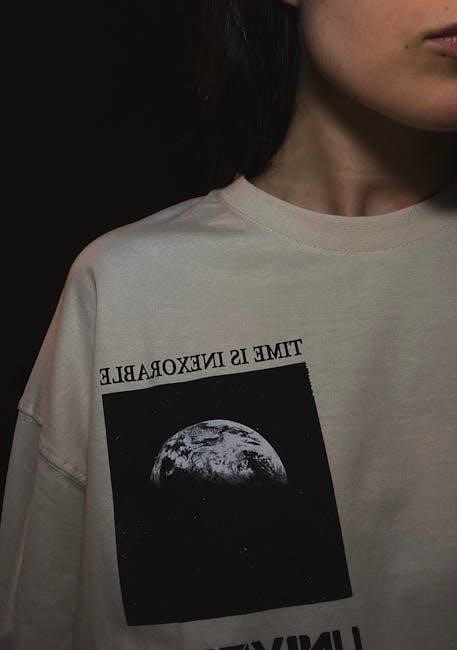
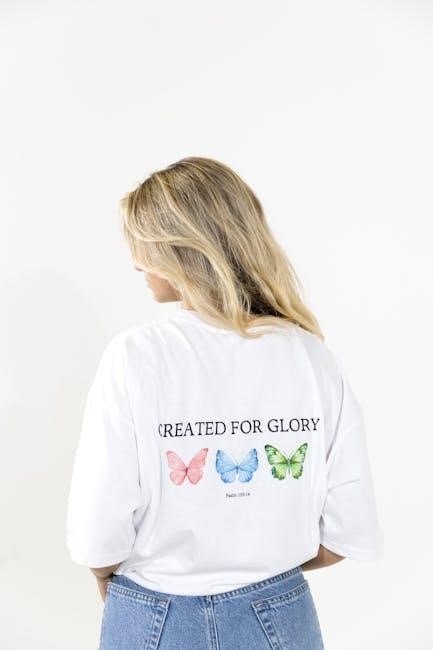
Proper placement ensures designs look balanced and professional. Center chest prints (6-10″ wide‚ 6-8″ tall) are ideal for logos‚ while full-front designs (10-12″ wide‚ 10-14″ tall) make bold statements. Always align designs symmetrically and use mockups to preview placement before printing for optimal results.
Center Chest vs. Full Front Placement
Center chest placement is ideal for smaller designs‚ typically measuring 6-10 inches in width and 6-8 inches in height‚ making it perfect for logos or minimalistic artwork. This placement ensures the design is easily noticeable without overwhelming the garment; On the other hand‚ full front placement offers a larger canvas‚ usually spanning 10-12 inches in width and 10-14 inches in height‚ allowing for bold‚ eye-catching designs. Choosing between the two depends on the design’s complexity and the desired visual impact. Proper alignment and symmetry are crucial for both placements to maintain a professional appearance. Using mockups can help determine the best fit for your design.
Best Practices for Symmetry and Balance
Achieving symmetry and balance in T-shirt printing ensures a polished‚ professional look. Measure designs from the center of the garment to maintain even placement. For sleeve prints‚ mirror the design on both sides to create visual harmony. Use the rule of thirds to balance elements‚ avoiding overcrowding. Ensure text is horizontal and readable when worn. Consider fabric shrinkage and adjust measurements accordingly. Test designs on mockups to verify alignment and proportions. Symmetry enhances aesthetic appeal‚ making designs more visually appealing and cohesive. Always double-check measurements and placement before printing to ensure a balanced‚ professional finish.
Tools and Resources
Utilize online sizing charts and mockup tools to visualize designs. Refer to print provider specifications for accurate measurements. Use design software like Adobe Illustrator or Canva for precise adjustments and ensure high-quality output with proper file formats.
Using Online Sizing Charts and Mockup Tools
Online sizing charts and mockup tools are invaluable for designing T-shirts. They allow you to visualize how your design will look on different garment sizes and styles. Tools like Placeit and Adobe Illustrator enable precise measurements and adjustments‚ ensuring your artwork fits perfectly. Mockups help you preview placement‚ symmetry‚ and proportions before printing. Many platforms offer templates for various garment types‚ such as hoodies‚ tank tops‚ and long sleeves. These resources also simplify scalability‚ letting you adapt designs for different audiences‚ from kids to adults. By leveraging these tools‚ you can achieve professional-grade results and avoid costly mistakes in production.
Print Provider Specifications and Requirements
Understanding your print provider’s specifications is essential for seamless T-shirt production. Most providers outline maximum printable areas‚ resolution requirements‚ and file formats. For example‚ common image resolutions range from 150 to 300 DPI‚ with 300 DPI being ideal. File formats like JPEG or PNG are typically preferred. Design dimensions must align with the provider’s equipment capabilities‚ such as 12×16 inches for front/back prints. Some services automatically scale designs for smaller garments‚ but designing for S/XS sizes ensures consistency. Always review your provider’s guidelines to avoid delays or additional fees. Using providers with mockup tools ensures accurate previews‚ helping you meet their requirements and achieve flawless prints every time.